How to Prime a Vape Coil: Safe Setup and Waiting Times
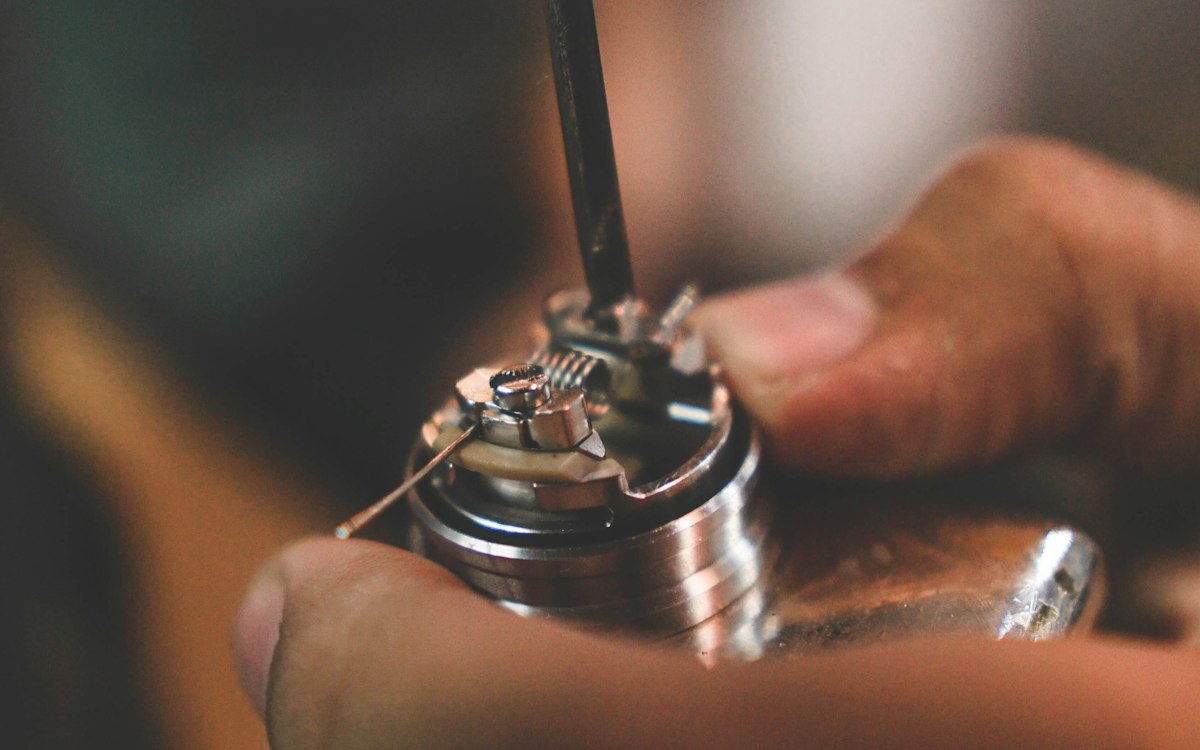
To prime a vape coil, first identify whether it is a removable tank coil or an integrated refillable pod. Add compatible e-liquid only through the intended opening, give the wick the waiting time stated in the manufacturer instructions, and never activate a dry heating element. Some replaceable coils permit a few drops on visible cotton before assembly; sealed pods and disposables do not. Understanding how to prime a vape coil begins with knowing which parts are actually user-serviceable.
Priming is a hardware-maintenance process. It does not make inhaling nicotine or other vaping aerosol harmless. People who do not currently use nicotine should not begin using it because a device has been prepared properly.
Table of contents
Why a new coil needs time
Most refillable e-cigarette coils contain a resistive heating element and absorbent wicking material. The wick transports e-liquid from the reservoir to the heated surface. When a coil operates before liquid reaches the inner wick, that material can become scorched. A persistent burnt taste may remain even after liquid is added because damaged cotton cannot reliably be restored by soaking it again.
The reservoir can look full while the center of a wick remains dry. The waiting time lets the liquid travel through small openings and into the material near the heater. Priming also matters when a dry replacement pod is installed, but that does not mean every pod can be opened or directly wetted.
Identify the coil and reservoir
Before deciding how to prime a vape coil, check the exact model and its manual. A tank with a replaceable coil head, a refillable pod with an integrated coil and a prefilled closed pod require different handling. Their shapes alone do not tell you which method is approved.
- Replaceable tank coil: the coil head is removable, and the maker may permit wetting its visible cotton ports before fitting it.
- Refillable pod with integrated coil: the cartridge is filled through its designated opening and usually left to stand. Do not pry it apart.
- Refillable pod with separate coil: use the manufacturer instructions for inserting the coil, positioning seals and filling the pod.
- Prefilled pod: it arrives sealed with liquid. Follow its activation guide rather than attempting a manual refill.
- Disposable vape: it is not designed to be opened to expose the coil or battery. Do not modify it to carry out a priming step.
For the basic anatomy of these parts, read what a vape coil is. Matching the instructions to the actual device avoids many common mistakes.
How to prime a vape coil in a refillable tank
Check the correct replacement
Look at the coil name, resistance and manufacturer compatibility list. Two coil heads can look almost identical but have different contact points, seals or power ratings. Inspect the new part for visible damage. A coil with torn seals or a deformed housing should not be used.
Locate the wicking openings
With the device switched off, examine any visible absorbent material. The openings around the outside of many coil heads lead to the wick. The central passage normally carries air, not e-liquid. Keep liquid away from electrical contacts and do not poke the heater with a tool.
Apply liquid only when instructed
Certain brands advise placing a small amount of compatible e-liquid on exposed cotton before installing a new coil. Other products require filling the tank and waiting, with no direct drops. Follow the model-specific directions instead of relying on a universal drop count. Too much liquid can flood the center passage and cause gurgling or spitting.
Fit and fill the tank
Seat the coil as directed and ensure the gasket is correctly placed. Add liquid through the intended filling port, avoid the air channel and stay within the marked fill limit. Close the fill opening completely. If the product is meant to be filled while detached from the power unit, keep it detached until the recommended stage.
Respect the waiting period
Do not activate the heater immediately. Some Vaporesso products instruct users to wait about five minutes after first filling; Geekvape lists approximately five to ten minutes for certain tanks, while a SMOK atomizer guide specifies fifteen minutes. Those figures describe different products, not one universal rule. Your exact manual takes priority.
Check operating power
If the device allows wattage adjustment, use only the range the coil maker permits. Some compact pods choose the output automatically, so there is nothing to set manually. Do not override protection features or repeat long draws to test a coil that seems dry. Stop if a sharp burnt taste persists.
What about a refillable pod with a sealed-in coil?
For this design, how to prime a vape coil normally means filling the cartridge, securely closing its port and waiting. You cannot directly reach the wick without breaking the assembly. In particular, do not inject liquid through the mouthpiece, remove bonded plastic or dismantle the battery side.
A pod that will not hold liquid, produces a leak or has damaged contacts needs inspection under the manufacturer’s troubleshooting instructions. Attempted repairs can make leaks or electrical problems worse. Closed prefilled products and disposable devices have different instructions again and should not be treated as refillable reservoirs.
How long does a new coil need?
The required time depends on the manufacturer and design. Knowing how to prime a vape coil includes checking this timing rather than relying on internet averages. Some say five minutes, others ten or fifteen. Larger absorbent sections, thicker liquids and lower temperatures can affect liquid movement, but none of those considerations justifies ignoring a specific manual. If no instructions are available, identify the part number and look up the maker’s support page before use.
Do not heat a device to speed up saturation. Avoid guessing that several unpowered puffs are safe: a draw-activated vape may switch on when air moves through it. Follow the maker’s written method, especially when a pod and battery are integrated.
Mistakes that cause trouble
- Activating the device before the wick has finished absorbing liquid.
- Pouring e-liquid into the central airflow channel instead of the reservoir.
- Adding more drops than a coil design permits, causing a flooded chamber.
- Overfilling a tank or leaving the fill seal partly open.
- Installing an incorrect coil or operating outside its approved power range.
- Trying to restore a previously scorched wick with additional soaking.
- Opening a sealed pod or disposable to imitate a removable-coil tutorial.
If there is bubbling, popping with liquid droplets or repeated gurgling, the issue might be excess liquid rather than dryness. The separate guide on why a vape gurgles explains the difference between flooding and other faults.
What if the new coil tastes burnt?
A burnt taste can indicate an incompletely saturated wick, unsuitable settings, incompatible liquid or a damaged part. Stop using the device and recheck the manufacturer instructions. If the wick has been scorched, replacing the coil is usually more sensible than continuing to heat it.
Burnt taste can also develop after a period of normal use, when deposits build up or the reservoir runs too low. Those are different problems from first-time priming. See our guide to persistent burnt taste for the other common explanations.
Nicotine liquid and battery precautions
Keep nicotine-containing liquids away from children and pets. A swallowed liquid or significant skin exposure can be dangerous. Store bottles with their caps closed, clean any spill according to the label and seek medical or poison-center guidance when exposure is suspected.
Do not test a coil on a visibly damaged battery, charge a leaking device or bypass its electrical protections. The U.S. FDA advises following the manufacturer’s battery instructions and keeping charging devices away from heat and combustible materials. Coil preparation cannot correct a faulty battery.
Frequently asked questions
Do I need to drip liquid on every coil?
No. Many refillable pod systems work by filling the reservoir and waiting. Apply direct drops only if the instructions for your particular replaceable coil permit it.
Can a burnt coil be fixed by priming again?
Not reliably. Saturation prevents a dry new wick from being heated, but it does not undo damage to cotton that already scorched.
Should I prime a disposable vape?
Do not open a sealed disposable to access the coil. Follow its supplied user instructions; stop using a product that overheats, leaks or malfunctions.
Can I use a different liquid to make priming faster?
Use only liquids the device manufacturer supports. A thinner liquid is not automatically compatible with every coil, and improvised mixtures can create additional risks.
Final answer
The reliable answer to how to prime a vape coil is to match the preparation to the equipment. Identify the coil design, fill through the intended port, wait for the maker’s stated time and avoid operating a dry wick. Stop rather than improvise when a component is damaged or the instructions cannot be confirmed.